Getting Started
Assuming that you already have WordPress installed and running, we will jump to the theme installation process. If you need any help installing WordPress on your server, you can find useful guidance in this official article and this unofficial article.
Install The Theme#
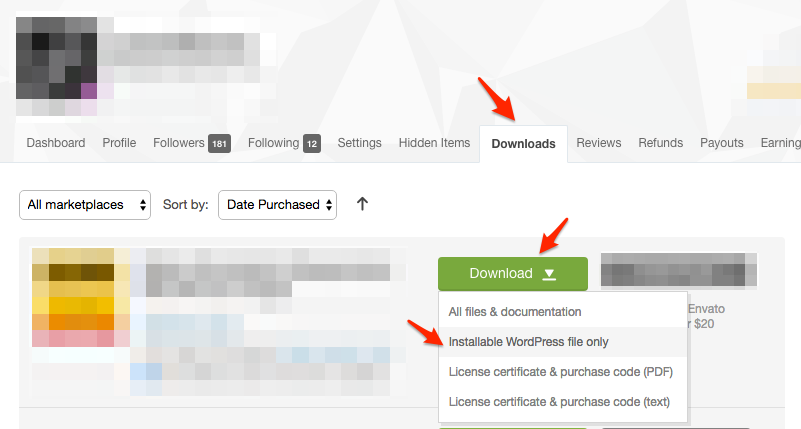
Download the theme files by going to Downloads tab on your ThemeForest account and select Installable WordPress file only from the download options. A Zip archive will download to your computer.
Once you have downloaded the installable theme package, you need to upload it to your WordPress site on your server. There are two ways to do this:
WordPress Upload#
Upload the theme package via WordPress admin panel by following the steps below:
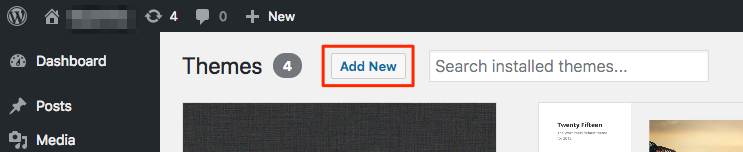
- Go to Appearance > Themes in your WordPress admin panel.
-
Click Add New.
-
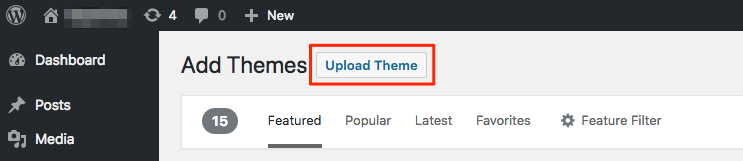
Click Upload Theme.
-
In the file upload area click Choose File and find the Zip archive (the installable theme pakage) on your computer.
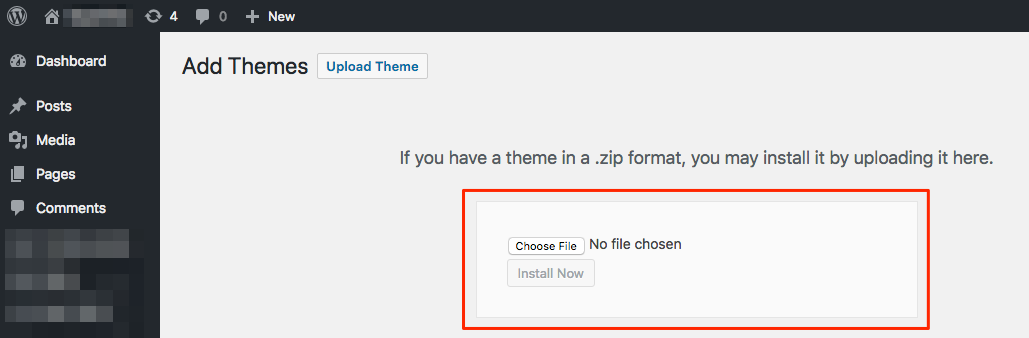
- Find the Zip archive (the installable theme pakage) on your computer and choose it.
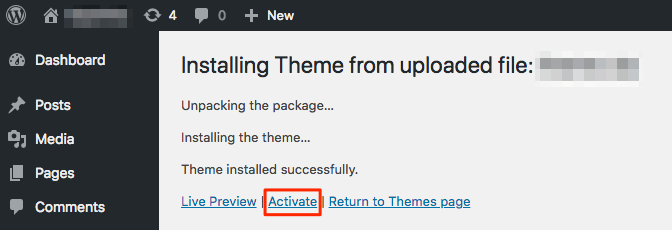
- Click Install Now and wait for the theme upload and installation to complete, this may take a few seconds or minutes depending on the file size and your internet connection speed; don't refresh or close the browser tab. An indication of the upload progress may appear somewhere in the lower edge bar of your browser.
-
Once the installation is complete and you get the "Theme installed successfully" message, click Activate as shown below.
FTP Upload#
Upload the theme package via FTP by following the steps below:
- Make sure you have your FTP account login details (username, password ...etc.). Use your hosting provider's documentation or contact them to get this information.
- Connect to your server via FTP client using your login details (FileZilla is a good free and cross-platform choice).
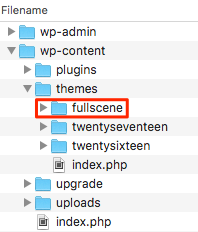
- Navigate to /wp-content/themes directory under your WordPress installation directory.
-
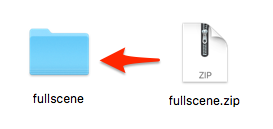
Extract the Zip archive (the installable theme pakage) on your local computer and uplaod the resulted folder to themes folder on your remote server.
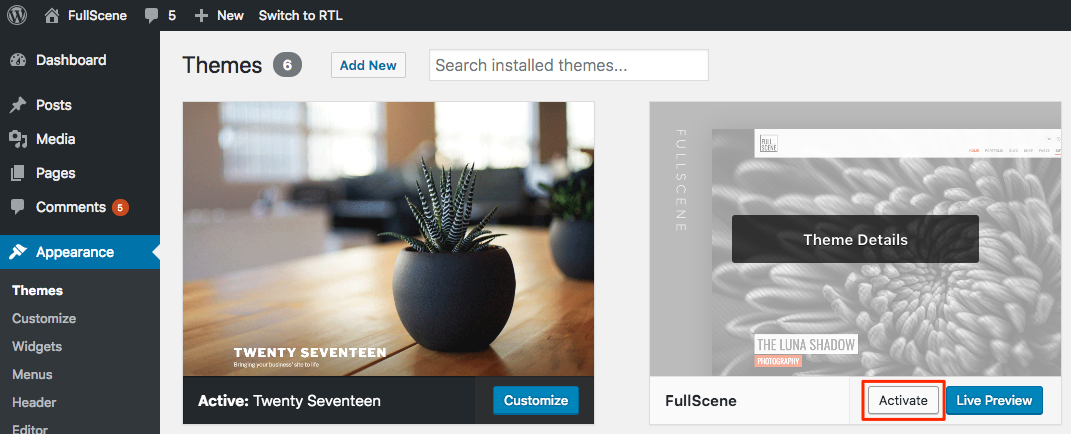
- Once the upload is complete, go to Appearance > Themes in your WordPress admin panel.
-
You should find the theme thumbnail, click Activate button on it.
At this point, you should have finished the initial theme installation. Now proceed to the next step, installing the required and recommeded plugins.
Always use the installable theme package (as is for WordPress admin theme uploader, and extracted for FTP) in theme installation to avoid mistakes and uploading the wrong files to your server that will lead to errors during the installation process.
Install Required Plugins#
Once you have the theme installed and activated, a banner will appear in the upper portion of the page prompting you to install some plugins.
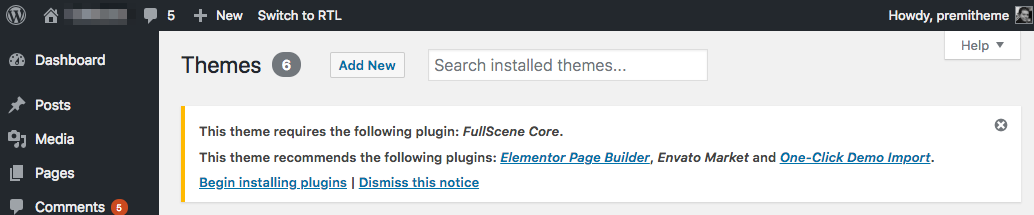
There are two types of plugins:
- Required plugin: Must be installed since it contains core theme functions and features. For example "FullScene Core" plugin must be installed.
- Recommended plugin: Optional plugin that may be installed if you need its features otherwise you can ignore it unless you're importing demo content that requires this plugin (even if it's recommended by default). More information about this in "Importing Demo Content" section below.
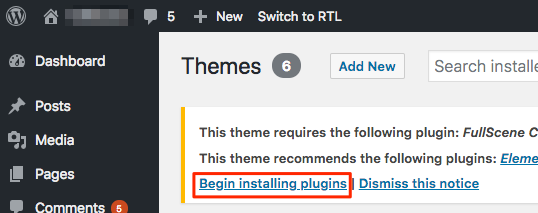
Start installing the required and recommended plugins by following the steps below:
-
Click Begin installing plugins in the banner, or go to Appearance > Install Plugins in your WordPress admin panel.
- Select the plugins you want to install.
-
Choose Install from the bulk actions dropdown and click Apply.
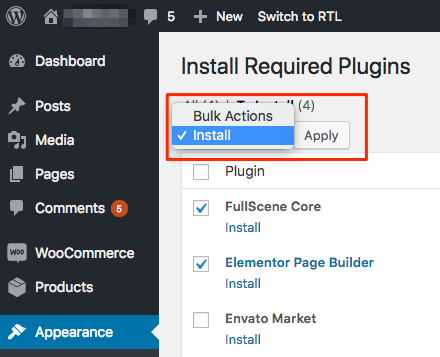
- Wait for the plguins to be installed and activated.
You will be informed if any of the installed plugins has update or if it's installed but not activated.
Import Demo Content#
It's NOT recommended to use the demo import feature if you have WordPress installation with existing content. Only use this feature with fresh empty WordPress installation to avoid duplicates or conflicts.
If you intend to use the one-click demo import feature, make sure to install and activate the demo required plugins before importing the demo content.
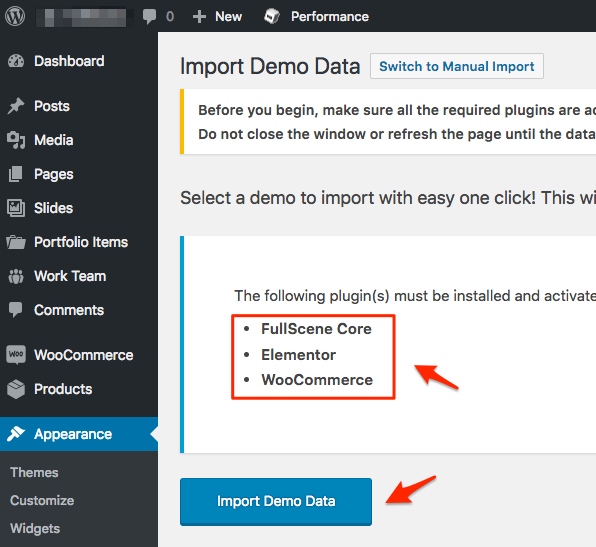
FullScene gives you the ability to import its demo website with all pages, posts and images by one simple click. To enable this feature you need to install and activate the recommended plugin "One-Click Demo Import", after that you can import any demo content by following the steps below:
- Go to Appearance > Import Demo Data in your WordPress admin panel.
- Make sure all the demo rquired plugins are installed and activated.
- Click Import Demo Data.
- Wait for the data to be imported. This may take few seconds or minutes depending on the demo content size and your internet connection speed; don't refresh or close the browser tab until you get the success message.
- Enjoy editing the imported content and customize it to your needs instead of start creating content from scratch.
If something goes wrong with the import process and you ended up with incomplete import, you can wipe your WordPress installation and reset to the default fresh state using WordPress Reset plugin, then start the import process again. Notice that by using this plugin you will lose any existing content.